Install Guide

Thinking About DIY Gutter
Guard Installation?

There are a number of risks of a DIY gutter guard installation, especially if you are inexperienced. As well as safety issues, a faulty guttering system can pose as a serious risk to the home appearance and structural integrity.

Installing new gutter guard means working at heights and using a ladder. Most people killed or injured due to ladder related injuries were doing maintenance around the home.

Please read the step-by-step install guide.

You can download a copy of our install guide for easy reference.

Get in touch

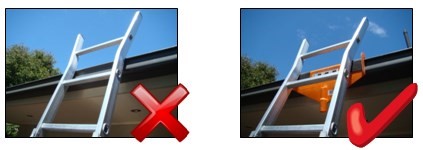
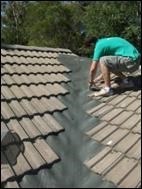
Working at heights on slippery uneven surfaces can be very HAZARDOUS.
Every effort should be made at all times to reduce the risk of injury and property damage
(Contact your local WorkCover Authority or local council for site specific safety regulations)

WHEN ENGAGED IN WORK AT HEIGHTS

  • Use a safety harness anchored correctly (have a contingency with an extra person to assist any potential falls)
  • Wear non slip shoes, do not over extend your weight transfer at any time
  • Protective clothing from the sun and the mesh are to be worn, (i.e. hats, gloves, sunscreen)
  • Do not work in the rain or on wet surfaces
  • The mesh itself can be very slippery, do not step on it or leave off cuts lying around
  • Use only rated ladders and scaffolds setup suitably on stable even ground
  • Make sure there are no overhead power lines in your vicinity
  • Ensure your tools are well maintained, it will give you a better result
  • Keep children and pets away from the work area at all times
  • Handle the product with care and wear gloves. It does have sharp edges
  • Use a ladder safe bracket to reduce chance of ladder slipping or damaging gutters

  • Cordless drill/screw gun with correct drives, drill bits (5/16)
  • A flat blade screwdriver (tiled roof)
  • Tinsnips, curved and straight
  • Silicone and silicone gun (if necessary)
  • Any applicable safety equipment (harness)
PRE DRILL TRIMS
Remove the protective plastic coating on the trims, then we recommend pre drilling your trims, it makes installation easier and will give a neater finish with evenly spaced drill holes. We suggest a screw to be put every 250 – 330mm.
Now you have your stock, check you have the correct amount and colour of mesh and accessories, planning now can save you time.
  • Ensure your gutter is clear of all debris prior to the installation If you are planning on hosing out your gutters be careful of the wet roof surfaces left behind
  • There are Gutter vacuuming companies available as well, (check the Yellow pages)
  • A plastic gutter scooper purchased from a hardware store can make the job a lot easier
  • Wear gloves and be careful not to cut your hands on the gutter or roof, the iron roofs can be especially sharp.
  • Roll out the mesh starting at one end of the gutter, leave a 250mm overlap where you start and cut off at end allowing a small overlap again
  • Fix the mesh to the gutter by tacking with screws (every 5m or so). This will hold the mesh in place as you prepare to attach the trims
  • Place the first trim on the starting end of the gutter, ensure the mesh is all the way under the trim between the trim and the gutter. Ensure the mesh is laid evenly then screw the trims on
  • The next trim is then overlapped by 10 – 15mm, align the predrilled holes and continue screwing the trims like this until the gutter run is complete.
  • When trimming a corner you can cut part way through a trim and bend to make a clean angle

  • Make sure your gutters are clear of debris and secure the mesh to front edge of gutter as detailed above
  • Make a 20mm V cut in mesh under each saddle before screwing down.
  • This will help the mesh contour with the profile of the exact roof profile
  • Then place the saddle on the edge of the mesh so that the top of the saddle sits just above the top of the mesh.
  • Screw the saddle down into the roof using screws provided. Be sure to put pressure on saddle and drill to avoid saddle slipping around.
  • Take care when positioning the saddles to achieve a quality result

  • On Trimdek a saddle is fitted on each high point of sheeting (6 per metre)
  • On CGI a saddle is fitted on every second high point of the roof sheet (7 per metre)
  • On a poly roof you can take out existing screws that are holding down the sheets, you can then put the same screw back in holding the saddle and the mesh down, this will eliminate any extra holes or cracking in your polycarbonate roof.

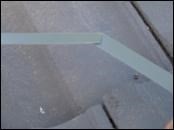
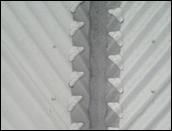
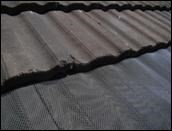
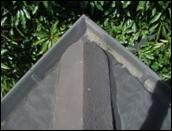
METAL RIDGE ROOF CAPPING

  • If you can install under the ridge cap it would be ideal, however if you cannot.
  • Neatly cut the mesh to fit over the roll of ridge capping and trim to the other side
  • Repeat procedure on opposite side of the ridge and secure with the screws provided

CORRO IRON VALLEYS

  • This is the similar to the gutter line
  • You will need 18 saddles per metre,
  • Measure the width of valley, we can cut the mesh to any size, 250mm is standard, make sure this enough to cover the valley and wide enough to be secured with 90mm saddles.
  • Lay the mesh out from top of valley to bottom, tack if necessary
  • Starting from the top you need put a saddle on each flute working your way down, and then repeat on the other side. You may find it easier to do a metre on each side, then even it up keeping the mesh straight.
  • As you can see in the diagram the saddles are reversed to fit the contour of the CGI.

  • Secure the mesh with the trims to the gutter edge as explained above, the mesh should overlap the second row of tiles by between 35mm to 100mm. (excess can be trimmed)
  • Make sure that 500mm (standard install width) is enough to get from the gutter lip to the second row of tiles, if not we can cut the mesh wider if necessary.
  • Cut the overlap on each side of every high point of the tile profile, this will assist in the mesh sitting flat when the tile locks the mesh in place.
  • If these cuts are too long it may result in diagonal tearing of mesh and may void warranty
  • In each section or run you will need to make sure that all the cuts are made ready for tucking, then lift the second row of tiles and tuck the flaps of mesh under the tiles
  • When tucking make sure you are wearing protective gloves to avoid sharp edges, you also need to make sure you have a secure work platform as there will be a shift in weight while lifting the tiles, ensure you are in a safe position to do this
  • If it is possible you can slide up the second row of tiles and then slide them back over the mesh, you may find this easier than lifting and tucking.

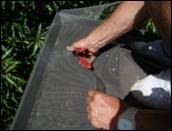
HIP ENDS OR STARTER CAPS
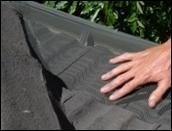
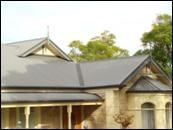
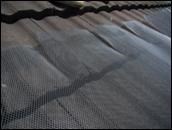
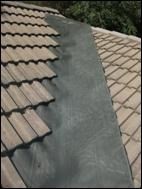
  • Cut the mesh neatly around the starter cap and use a bead of silicone (if necessary) to secure in place. Repeat this on the other side and secure the mesh together with the colour matched tech screws.
  • You may not be able to lift tiles next to the ridge cap without disturbing the pointing.
  • You need to cut the mesh so there is minimal overlap under the second tile, you can use a screwdriver to carefully lift and tuck the mesh under if necessary.

TILED VALLEYS

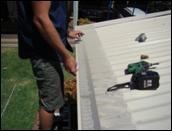
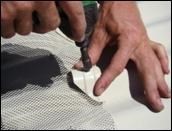
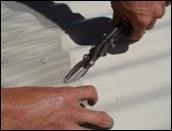
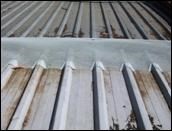
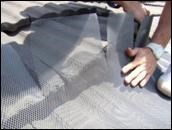
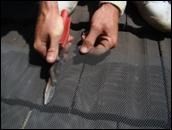
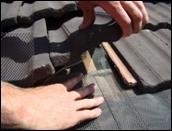
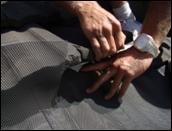
There are photos of the 3 step process however we recommend this job to be taken on by a competent installer, if you would like more information please enquire online and we can help.

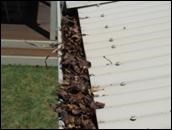
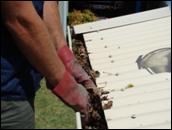
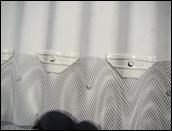
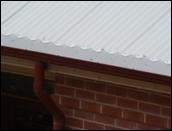
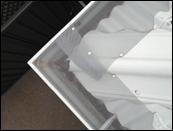
In most cases debris will clear off the roof with the wind. In areas of high levels of debris you may need to gently sweep or blow it off the roof. If your gutters have the correct fall dirt and small particles will flush out with the rain, if this is not the case you may need to flush the gutters. Please note that the mesh on your roof can be very slippery, do not walk on the mesh to reduce chance of damage and a fall.

Order Online